Streaming on YouTube with OBS Studio is one of the most flexible ways to reach an audience. YouTube handles the viewers, the chat and the video archive, while OBS gives you full control over what appears on screen: your camera, your game or application, slides, overlays and audio. Because OBS is free and open-source software, you can build a professional-looking broadcast without paying for streaming software, and you can reuse the same setup for tutorials, gaming, music, talks and product demonstrations. This guide walks through the whole process in order, from preparing your channel and installing OBS to connecting the two, choosing sensible settings and running a private test before you go live. It assumes OBS Studio 33.0.1, the latest version at the time of writing, on Windows 10 or 11, macOS 13.0 or newer, or a supported Linux distribution. Platform menus on YouTube change from time to time, so where this guide describes a YouTube page, treat the steps as the general flow and follow the platform’s current instructions if a label has moved.
What You Need Before You Stream on YouTube
Before you open OBS, make sure the foundations are in place. You need a YouTube channel, a Google account that can access it, and a stable internet connection with enough upload speed for live video. Download speed matters far less than upload speed: the stream leaves your computer and travels to YouTube, so a connection that is fast for watching videos can still struggle to send one. A wired Ethernet connection is usually more stable than Wi-Fi, especially for longer broadcasts, because it avoids the interference and signal drops that can interrupt a wireless link. If you must use Wi-Fi, sit close to the router and close bandwidth-heavy apps on other devices. You also need OBS Studio installed. If you have not installed it yet, get it from the official distribution files linked on this site’s Windows download page, and follow the guide to using OBS for the first-run setup.
Set Up Your Scenes and Sources in OBS
A scene in OBS is a complete layout: everything the viewer sees at one moment. A source is one element inside that layout, such as a camera, a game window, an image or a microphone. Most YouTube streamers need only two or three scenes to start. A useful starter set is a main scene, a “starting soon” scene, and a “be right back” scene. The main scene holds your camera and your main content, whether that is a game, a browser window or slides. The starting scene can be a simple full-screen image with text, and the break scene can reuse that image with different wording. Keeping the set small makes switching easy while you are live, and you can add more scenes later once you know which layouts you actually use. To create a scene, use the plus button under the Scenes panel, give it a clear name, and then add sources with the plus button under the Sources panel.
Connect OBS to YouTube
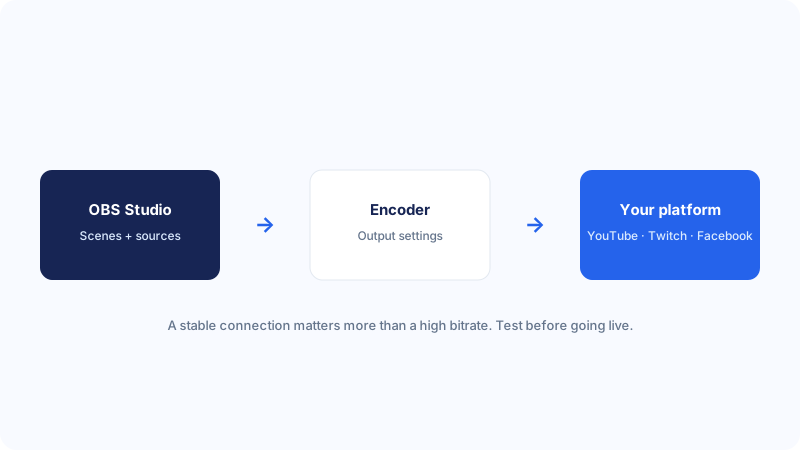
OBS connects to YouTube through the Stream settings. Open Settings, then the Stream tab. In the Service list, choose YouTube. OBS offers two ways to connect: signing in to your YouTube account from inside OBS, or using a stream key. Signing in is the simpler route for most people, because OBS can then fetch the correct server and your stream details automatically, and you do not have to copy a long key by hand. The account-connection flow opens a browser window where you sign in to Google and grant OBS permission to manage your live streams. Follow the prompts, return to OBS, and check that the connected account and channel shown are the ones you intend to stream to. If you manage several channels, this check matters: streaming to the wrong channel is an easy mistake and a hard one to undo once viewers have joined.
The alternative is the stream key. In YouTube’s live streaming area, you can find a stream key for your channel and paste it into OBS, with the server set to the recommended YouTube ingest server. A stream key is like a password for your channel’s live input, so treat it as private: never show it on screen, never paste it into a chat, and never share a screenshot that includes it. If a key is ever exposed, reset it in YouTube and update OBS with the new one. Some creators prefer the stream key route because it works with setups where signing in is awkward. Either method sends the same video to the same place; the choice is about convenience and how you manage access. Exact labels inside YouTube’s streaming pages can change, so if a button has moved, follow YouTube’s current instructions for finding the stream key.
- Open OBS, go to Settings, then Stream, and choose YouTube as the service.
- Connect your YouTube account from inside OBS, or paste your stream key if you prefer that method.
- Confirm the connected channel is the correct one, then click OK to save the settings.
- Create your stream’s title and description on YouTube, choosing the right visibility for a test or a live broadcast.
- Run a short test stream before the real one, as described in section 6.
Choose Stream Settings That Fit Your Content
OBS has three settings areas that matter most for a YouTube stream: Video, Output and Audio. In the Video tab, set your base canvas resolution to match your screen or content, commonly 1920 by 1080, and set the output resolution to the same value or one step down, such as 1280 by 720, if your computer or connection struggles. The frame rate is usually 30 frames per second for talks, slides and casual streams, and 60 for fast-moving games where smooth motion matters. Higher resolution and higher frame rates both need more encoding work and more upload bandwidth, so raising them without the hardware and connection to support them makes a stream worse, not better. Our best OBS streaming settings guide and the OBS bitrate guide explain these trade-offs in more depth, with starting-point ranges you can adapt to your own setup.
Add Titles, Chat and On-Screen Elements
On-screen elements should help the viewer, not distract them. A small lower-third with your name or the stream topic, a title at the start, and a simple overlay frame are usually enough for a first YouTube stream. Add text with a Text source, and images such as a logo or a background with an Image source. Keep colours consistent, use a font that stays readable at small sizes, and avoid filling the screen with handles, animated banners and tickers all at once. If you want viewers to see live chat on screen, you can add a browser source pointing at a chat overlay provided by a third-party chat tool, but check that tool’s privacy and moderation implications first, and remember that chat messages on screen are visible to everyone, including any spam that slips through. Moderate chat, or keep the on-screen chat hidden until you are comfortable managing it live.
Do a Private Test Stream First
A private test stream is the single most useful habit in this guide. Before your public broadcast, create a test stream on YouTube set to private or unlisted, start streaming from OBS, and watch it on another device. Check four things: the picture shows the right scene at the right size, the sound is clear and in sync, the stream does not buffer or drop frames, and the title and description are correct. Speak for a minute, switch scenes, show a slide or a game, and then stop the test and watch the recording back. This takes ten minutes and catches most problems that ruin a first stream, from a muted microphone to a capture source showing the wrong window. YouTube’s own stream health information can also tell you whether the connection is stable. If the test reveals a problem, fix it and test again; a second short test is far cheaper than losing the opening minutes of a real audience.
Go Live and Manage Your Stream
When the test is clean, you are ready to go live. Create the public stream on YouTube with a clear title, a short description and the correct visibility, then click Start Streaming in OBS. Give yourself a calm opening: greet viewers, say what the stream will cover, and give people a minute to arrive before the main content begins. Early viewers often join during the first few minutes, so starting with your most important point in the first ten seconds wastes it on an almost empty room. Speak a little more slowly than feels natural, look at the camera during introductions, and pause between points so questions can catch up. Keep water nearby, keep your notes where you can glance at them without looking away from the camera for long, and keep the OBS window where you can see the audio meters and the stream status.
Common mistakes
The most common mistake is skipping the test stream and discovering a muted microphone or a wrong scene in front of a live audience. The second is streaming to the wrong channel because two Google accounts are signed in, so always confirm the channel before going live. A third is setting the bitrate or resolution higher than the upload connection can sustain, which produces buffering for viewers even though the picture looks fine in OBS itself. A fourth is forgetting that a stream key is private and showing it on screen during a setup video or screenshot. A fifth is overloading the layout with overlays, tickers and chat, so viewers cannot find the actual content. A sixth is using copyrighted music or video clips without permission, which can lead to YouTube restricting or removing the stream recording; use music you have the right to use, or none at all. Finally, many beginners forget to check the recording’s visibility after the broadcast, and leave a rough test public by accident. A short checklist before and after each stream prevents almost all of these.
Troubleshooting
If OBS will not connect to YouTube, first check that you are signed in to the correct Google account and that the connection in Settings, then Stream, is still valid; reconnecting the account fixes many failures, and a reset stream key fixes the rest. If the stream connects but viewers see buffering, lower the video bitrate and the output resolution in steps, and test on a wired connection if possible. If OBS reports an overloaded encoder, lower the output resolution, drop the frame rate to 30, or switch to a hardware encoder if your computer supports one. If there is no audio, check that the microphone is selected in the Audio Mixer, that it is not muted in OBS or in your operating system, and that the correct device is chosen in Settings, then Audio. If the camera shows a black screen, close other apps that may be using it, such as a video-call program, and reselect the device in the Video Capture Device source. If a game or window does not appear, try Window Capture instead of Display Capture, run OBS as administrator on Windows if the application requires it, and make sure the window is not minimised. Keep notes on what fixed each problem so the next stream starts faster.
Frequently asked questions
Do I need a stream key to stream on YouTube with OBS?
No, not necessarily. You can connect your YouTube account directly from OBS in Settings, then Stream, which is the simpler route for most people. A stream key is the alternative method: you copy the key from YouTube and paste it into OBS. Both send video to the same channel, so choose whichever you find easier to manage, and keep a stream key private if you use one.
Can I stream on YouTube for free with OBS?
Yes. OBS Studio is free and open-source software, and YouTube does not charge creators to stream live, although YouTube has its own eligibility and verification requirements for live streaming. You still need a computer, a camera or screen content, and an internet connection with enough upload speed, but there is no software fee for OBS itself.
Why does my YouTube stream keep buffering for viewers?
Buffering usually means the video bitrate is higher than your upload connection can sustain, or the connection itself is unstable. Lower the bitrate and the output resolution in OBS, use a wired connection if possible, and close other apps that upload data. Check the dropped-frames figure in the OBS status bar: if it keeps rising, the stream is sending more data than the connection can carry.
Can I record my stream at the same time?
Yes. In OBS, the Output settings let you record locally while streaming, and you can choose separate audio tracks for the stream and the recording. This gives you a local copy even if something goes wrong with the live broadcast. Recording at the same time uses more disk space and some extra encoding work, so test it before relying on it for an important stream.
What should I do if my microphone is not heard on the stream?
Check the Audio Mixer in OBS while you speak: the microphone meter should move. If it does not, check that the right device is selected, that it is not muted in OBS or in your operating system, and that no other app has taken exclusive control of it. If the meter moves but viewers hear nothing, check that the microphone is assigned to the audio track your stream uses, as explained in our OBS audio settings guide.
Conclusion
Streaming on YouTube with OBS comes down to a repeatable routine: prepare your channel and your content, build a small set of clean scenes, connect OBS to the right YouTube account, choose modest settings that your computer and connection can sustain, and test privately before every public broadcast. You do not need the highest resolution, the most overlays or the most expensive equipment to start; a clear picture, clear audio and a calm opening will carry a first stream further than any of those. As you gain experience, refine one thing at a time: a better microphone position, a tidier scene, a setting that suits your content. Keep your stream key private, watch the dropped-frames figure during each broadcast, and review your recordings to find the next small improvement. With that habit in place, YouTube and OBS together give you a free, flexible platform for reaching viewers, and each stream becomes easier than the last.