Recording in OBS Studio can feel confusing because one menu affects several things at once: picture sharpness, smoothness, file size, and how hard your computer works. Raise the resolution and the image looks sharper, but the file grows and the encoder works harder. Raise the frame rate and motion looks smoother, but again the workload and file size rise. The best OBS recording settings are therefore a balance, not a maximum. They depend on what you record, where the video will be watched, how much storage you have, and what your hardware can handle comfortably.
This guide walks through that balance in plain language. You will learn what each major setting does and how to build three starting profiles for everyday, higher-quality, and lighter recording. Every number here is a starting point to test with a short recording, not a promise of a particular result. Results depend on your hardware, your encoder, the content on screen, and other programs running at the same time. If you are new to OBS, read our guide to using OBS first, and see how to record your screen with OBS for the basic capture steps.
What recording settings actually control
Before changing anything, it helps to know which settings do what. Resolution decides how many pixels make up each frame, so it has the biggest effect on sharpness, especially for text and small details. Frame rate decides how many frames are captured each second, so it affects how smooth motion looks. The encoder compresses the raw picture into a video file; different encoders use the processor or the graphics card, and they trade speed, quality, and file size in different ways. Bitrate and quality settings decide how much data the encoder may use.
The recording format decides the container for that compressed video, such as MP4 or MKV, and it affects compatibility and what happens if OBS closes unexpectedly. Audio settings decide how clean voices and game sound will be. Changing one setting in isolation rarely fixes a problem: a blurry recording may be caused by low resolution, low bitrate, or heavy downscaling, and each has a different fix.
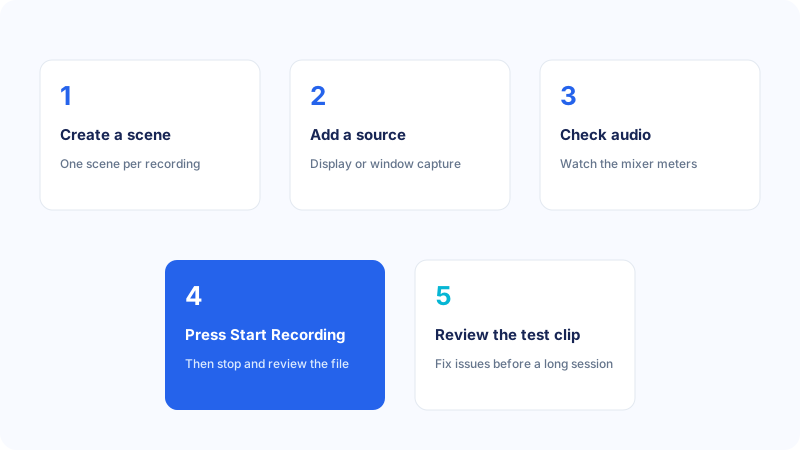
Open Settings from the lower-right corner of OBS. Use the Video tab for resolution and frame rate, the Output tab for the encoder, rate control, bitrate, and recording format, and the Audio tab for sample rate, channels, and devices. Switch Output Mode to Advanced if you want separate recording and streaming settings, then click Apply and OK and make a short test recording.
Choosing resolution and frame rate
For most people, 1920 by 1080, commonly called 1080p, is a sensible starting point. It is sharp enough for text and detail, widely supported by players and editors, and far less demanding than 4K. If your screen is 1080p, recording at the same resolution avoids scaling. If your screen is larger, you can still record at 1080p by setting the output resolution lower than the base resolution, which keeps files smaller and the workload lower.
Thirty frames per second is smooth enough for tutorials, presentations, and most desktop work, and it keeps file sizes moderate. Sixty frames per second looks smoother for games and animation, but it roughly doubles the frames the encoder must process. Match the frame rate to the content: use 30 for mostly static content and 60 for fast motion. If you are unsure, start at 30 and only move to 60 if motion looks choppy.
Base resolution is the size of the working area inside OBS; output resolution is the size of the recorded file. When they match, OBS does no scaling. When the output is smaller, OBS scales the picture down, and the downscale filter affects how clean it looks. Bilinear is lighter, while Lanczos can look sharper but costs more power. For a 1080p recording on a 1080p screen, set both to the same value.
Choosing an encoder
The encoder choice is often the difference between a smooth recording and an overloaded one. OBS offers a software encoder, usually x264, and hardware encoders provided by graphics cards, such as NVENC on NVIDIA cards, AMF on AMD cards, and Quick Sync on Intel graphics. The software encoder runs on your processor and can produce good quality at lower bitrates, but it competes with the game or application you are recording for processor time. Hardware encoders run on a dedicated part of the graphics card, so they leave the processor freer, which is why many people recording games prefer them.
There is no single encoder that is best for everyone. If you record tutorials and your processor has spare capacity, x264 with a moderate preset can work well. If you record games, a hardware encoder is often the more comfortable starting point. If your computer only offers one encoder, use that one and adjust the other settings around it. Test a one-minute recording with movement, text, and sound, then watch it back before deciding.
Encoder presets trade quality against workload. Slower x264 presets aim for better quality at the same bitrate but use more processor time; faster presets use less processor time but may need a higher bitrate. Hardware presets work the same way: a quality preset is a reasonable starting point, and you should move to performance only if you see overload warnings. Change the preset only after a test recording shows a problem.
Bitrate, rate control and quality
Bitrate is the amount of data used per second of video. Higher bitrate usually means a clearer picture, especially in scenes with lots of movement, fine detail, or sudden changes, but it also means larger files. Lower bitrate keeps files small but can make fast motion look blocky or soft. For recording, unlike live streaming, you are not limited by an upload connection, so you can use a higher bitrate than you would for streaming, provided you have enough storage. That freedom is useful, but it does not mean unlimited bitrate is helpful: beyond a certain point, extra data brings little visible improvement while files keep growing.
Rate control decides how the encoder uses that bitrate. Constant bitrate (CBR) keeps the data rate steady. Variable bitrate (VBR) lets the encoder use more data for complex scenes and less for simple ones. Constant quality, shown as CRF for x264 or CQP for hardware encoders, targets a quality level instead of a fixed bitrate. As a starting point, a 1080p recording at 30 frames per second often looks good at roughly 8,000 to 12,000 kilobits per second with CBR, or CRF 20 to 23 for x264. If text looks soft, raise the quality slightly; if files are too large, lower it slightly and compare.
To test a bitrate change, record one minute of typical content, change only the bitrate or quality value, record the same kind of content again, and watch both clips at full screen while checking file sizes. Keep the lower setting if you cannot see a clear difference, because smaller files are easier to store and edit.
Recording format and file management
MP4 is widely supported by players, editors, and sharing sites, which makes it convenient when you plan to edit or upload quickly. MKV is more resilient: if OBS closes unexpectedly or your computer loses power, an MKV file is more likely to remain playable, while an MP4 file recorded in the same situation can become unusable. Many people therefore record to MKV and then convert to MP4 using Remux Recordings under File in OBS, giving them the safety of MKV and the compatibility of MP4.
File management matters once recordings accumulate. A one-hour 1080p recording can easily use several gigabytes, depending on bitrate and content, so check your free space before a long session. In Settings, then Output, set a clear recording path, such as a dedicated folder, and consider a file name that includes the date or project name. After each session, watch the first minute and move finished recordings to their long-term folder. For gameplay, our gameplay recording guide covers capture sources and scene setup.
To remux, finish recording, choose File, then Remux Recordings in OBS, select the MKV file, choose the MP4 destination, and check that the new MP4 plays correctly before deleting the original.
Audio settings for clean recordings
Good audio often matters more than a small increase in video quality. Viewers will tolerate a slightly softer picture, but they quickly leave a video with quiet, distorted, or echoing sound. In OBS, set the sample rate to 48 kilohertz and the channels to stereo as a common starting point. Choose the correct desktop audio device for game and application sound, and the correct microphone for your voice. If you hear yourself twice, both desktop audio and a monitor output may be feeding the same sound back into the recording.
Speak at your normal volume and watch the microphone meter: it should move well into the yellow area on louder words without staying in the red. Desktop audio should be audible but not so loud that it drowns out your voice. Use the Audio Mixer sliders to balance the two, and add filters only when you need them, such as noise suppression for a noisy room. Record a short test and listen with headphones. Our OBS audio settings guide explains filters, tracks, and monitoring in full.
Three practical starting profiles
Use these profiles as starting points, then adjust one setting at a time after a test recording. They are not minimum specifications and they do not promise a particular result on any specific computer.
Profile A: Everyday 1080p recording
Use this for tutorials, presentations, and general desktop recording. Set base and output resolution to 1920 by 1080, frame rate to 30, and the encoder to your hardware encoder if available, otherwise x264 on a moderate preset. Use CRF 21 to 23, or a bitrate of about 10,000 kilobits per second, and record to MKV, then remux to MP4. This keeps files manageable, text readable, and the workload moderate.
Profile B: Higher-quality 1080p recording
Use this for gameplay or animation, where smoother motion and finer detail matter. Set resolution to 1920 by 1080, frame rate to 60, and use a hardware encoder on a quality preset if you have one. Use CRF 18 to 20, or a bitrate of about 16,000 to 20,000 kilobits per second, and allow extra storage. If you see encoding overload, lower the frame rate to 30 first, then lower the quality slightly.
Profile C: Lighter recording for a modest computer
Use this when your computer struggles, or for long sessions with smaller files. Set output resolution to 1280 by 720, frame rate to 30, and use the lightest encoder option available. Use CRF 23 to 25, or a bitrate of about 5,000 to 6,000 kilobits per second, and close unnecessary programs before recording. The picture will be softer than 1080p, but usually clear enough for spoken tutorials. For more help, see our guide to OBS settings for low-end PCs and the bitrate settings guide.
Common mistakes
The most common mistake is setting everything to the highest value at once: high resolution, 60 frames per second, maximum bitrate, and a slow encoder preset. That combination can overload even a capable computer and produce stuttering that a lower setting would have avoided. Another mistake is recording straight to MP4 for long sessions, then losing the file when OBS closes unexpectedly. A third is ignoring audio until the end: a quiet microphone or buzzing background noise is harder to fix after recording than before it.
- Copying someone else's exact settings without testing them on your own hardware.
- Changing resolution, frame rate, encoder, and bitrate all at once.
- Using the same settings for streaming and recording, even though recording can use higher bitrate.
- Recording at a higher resolution than your screen, which adds scaling work for little benefit.
- Leaving the microphone too far away, then raising the volume in editing and bringing up background noise.
Troubleshooting
If a recording looks blurry, check whether the output resolution is lower than you expected, then raise the bitrate or quality value slightly and record the same scene again. If the video stutters, lower the frame rate from 60 to 30, switch to a hardware encoder if available, or use a faster encoder preset. If OBS shows an encoding overload warning, close other heavy programs and reduce the resolution or frame rate. If the file is very large, lower the bitrate or use a slightly higher CRF value.
If there is no sound, check the Audio Mixer meters while you play audio, confirm the correct desktop and microphone devices are selected in Settings, then Audio, and make sure the tracks you need are enabled in Output, then Recording. If a recording will not play, check whether it was recorded as MP4 and interrupted; try the original MKV file if you have one. For persistent encoding problems, see how to fix encoding overloaded in OBS.
Frequently asked questions
What is the best resolution for OBS recording?
For most people, 1080p is a good starting point because it looks sharp for text and detail and is less demanding than higher resolutions. Use 720p if your computer struggles or you need smaller files.
Should I record in MP4 or MKV?
MP4 is more widely compatible, while MKV is more resilient if OBS or your computer closes unexpectedly. A common approach is to record to MKV and then use File, then Remux Recordings to convert the finished file to MP4.
What bitrate should I use for 1080p recording?
As a starting point, many 1080p recordings at 30 frames per second look good at roughly 8,000 to 12,000 kilobits per second, or CRF 20 to 23. Fast-moving content may need more, while simple desktop content may need less.
Is x264 or a hardware encoder better for recording?
It depends on your hardware and what you record. Hardware encoders free up the processor, which helps when recording games, while x264 can work well for desktop recording when the processor has spare capacity. Try both on a short test clip.
Why is my OBS recording laggy or stuttering?
Stuttering often comes from a workload that is too high: high resolution, high frame rate, a slow preset, or other heavy programs running at the same time. Lower the frame rate to 30, reduce the output resolution, use a faster preset or a hardware encoder, and close unnecessary programs.
Conclusion
The best OBS recording settings are the ones that give you a clear, smooth result your computer can sustain for the whole session. Start with 1080p at 30 frames per second, a sensible encoder and quality setting, MKV recording with remuxing to MP4, and balanced audio levels. Test with a short clip, change one setting at a time, and keep the lowest values that still look and sound good to you. If you also stream, compare these choices with our best OBS streaming settings guide, because streaming has different limits.